Combining Google Assistant, IFTTT and Home Assistant provides us access to a powerful tool: Voice-activated shell commands. No more getting up from the couch and physically control devices. Calories have rights too and we should stop burning them. Let’s go!
IFTTT stands for “If This Then That” and is a web-based service which enables a large variety of applications to communicate with each other. Conveniently for us, it supports both Google Assistant and Home Assistant - an open-source platform which you can as a server on your computer (at the time of writing it supports Linux, Windows, OS X, FreeBSD) and is able to monitor and control your home automation devices. But the main feature of interest for us in this post is the ability to run shell commands.
The implementation of the Home Assistant wasn’t quite intuitive, so I will provide a clear step-by-step guide to the best of my writing skills. If you are running a Debian-based OS like I do (Raspbian), this guide should be a perfect fit for you. I haven’t tried this setup on other OSs but it should work on everything that can run Python 3. Alright, enough with the introduction, our homes are eagerly waiting to be made alive!
Overview
Needed for this project:
- Computer which runs the Google Assistant and can run Home Assistant, e.g. Raspberry Pi 3 running Raspbian Jessie. Additionally, internet access and peripherals to record and play audio
- (Optional) A computer that supports Wake-on-LAN for booting from the network
The second computer is for me to demonstrate the functionality of the shell command feature. But also since its base unit is cramped somewhere under my desk guarded by a cable clutter and a potential army of spiders, I might as well have a small upgrade in quality of living. Naturally you can use any other shell command such as touch ~/test.txt to test the functionality.
Step 0: Prerequisites
You first need a device running Google Assistant. Google provides a great guide on how to install it. You can take a look at this post for more details - I guarantee it wont bite!
Step 1: Install Home Assistant
Similar to the Google Assistant installation, I will install the Home Assistant in a Python virtual environment again so it wont mess with any existing Python installments. If you prefer a different installation method, check out this page.
[IMAGE: screenshot of Home Assistant installation in Terminal]
As usual, we start by getting all packages up-to-date from the command line:
$ sudo apt-get update && sudo apt-get upgrade
Install & update Python 3, pip and the virtualenv tool afterwards:
$ sudo apt-get install python-pip python3-dev
$ sudo pip install --upgrade virtualenv
The Home Assistant server will be constantly connected to the internet, so it is a good idea to create a separate user for it to limit its permissions. This part could introduce complications to the implementation, but security is a value worth fighting for!
Add a system user and a group to your system:
$ sudo adduser --system homeassistant
$ sudo addgroup homeassistant
We will need a directory to store for the virtual environment and the server files and you can choose whichever location you prefer. As an example I will use the directory suggested in the documentation. Afterwards we need to grant our new user full access to the directory:
$ sudo mkdir /srv/homeassistant
$ sudo chown homeassistant:homeassistant /srv/homeassistant
Once this is done, we will switch to the homeassistant user and create a virtual environment in which the Home Assistant is installed:
$ sudo su -s /bin/bash homeassistant # -s option specifies a shell in which we will operate. By default, system users don't have a shell.
$ virtualenv -p python3 /srv/homeassistant # create virtual environment
$ source /srv/homeassistant/bin/activate # change into virt. env.
(homeassistant)$ pip3 install --upgrade homeassistant
Now you can start Home Assistant while in the virtual environment with
$ hass
If you are outside of the environment, run these lines which can be saved in a bash script:
$ sudo su -s /bin/bash homeassistant << EOF
$ source /srv/homeassistant/bin/activate
$ hass
Or alternatively simply run:
$ sudo -u homeassistant -H /srv/homeassistant/bin/hass
To see if the Home Assistant server is running, launch http://<Rasperry-Pi-IP>:8123 on another computer in your web browser or http://localhost:8123 if your Raspberry Pi has a GUI and a web browser.
You can close the server for now with the shortcut Ctrl + C.After we adjust the Home Assistant configurations, we should specify what shell command to run and then copy-paste a few lines to setup IFTTT with the rest, which should be smooth sailing. Arr!
Step 2: Home Assistant setup and shell command services
The link to the IFTTT service demands that our Home Assistant server is exposed to the outside world. As such we need to tend to the server security for a bit.
Open the configuration.yaml file found in ~/.homeassistant of in homeassistant’s home directory. By default the full path is /home/homeassistant/.homeassistant/.
$ cd /home/homeassistant/.homeassistant/ # run as user homeassistant
$ nano configuration.yaml
Add a password for the Home Assistant web interface in the following entry:
http:
  api_password: <your-ingenious-password>
Note: Make sure to include keep the indent of two spaces which are crucial for the YAML language and add them if you want to add new configuration variables.
Note: Unfortunately this wont be enough to secure our server. The connection to it is unencrypted and we have to make web requests which target an URL that contains our password in plaintext.
Additionally, since our Internet Service Provider will change our external IP in random intervals, we will have a difficult time keeping our setup running without adjusting the configurations every now and then. But luckily we can set up encrypted communication by using HTTPS and dynamic DNS service. The latter will assign a static URL to your external IP address and whenever it changes, your device will tell the DDNS service to assign the URL to your new IP address.
For the sake of briefness I will leave this part out for this guide and will at a later point write on how I set up these components. We will focus on getting the system up and running for now. Meanwhile here is a great guide on how to use DuckDNS and Let’s Encrypt to solve the dynamic IP issue and implement encryption: I’m a fancy guide.
Add this line at the end for the shell command service:
shell_command: !include shell_commands.yaml
This will read the configuration for shell commands from a file called shell_commands.yaml. It is good practice to split up the configuration file into multiple files for readability and manageability.
In the same directory as configuration.yaml we create and edit a new file:
$ nano shell_commands.yaml
Then add a shell command of your choice using the format <command-name>: <shell-command>.
test_cmd: touch /home/homeassistant/.homeassistant/test.txt
Save and reboot your Home Assistant server.
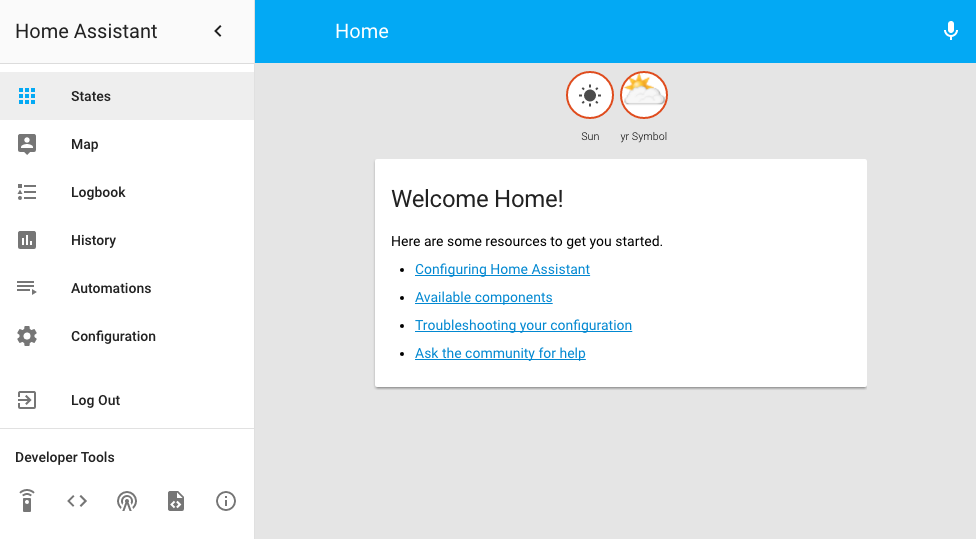
Log into the web interface with the password you wrote into configuration.yaml. In the sidebar on the left under Developer Tools, click the left-most button which reads “Services”.
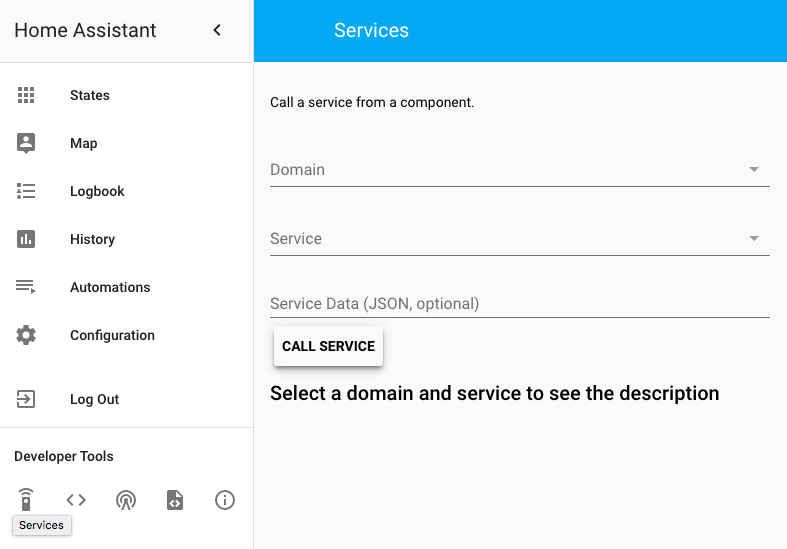
After choosing shell_command in Domain you should be able to see and select your custom shell command, e.g. test_cmd. Test the shell command by clicking CALL SERVICE down below and check if the shell command was executed.

Note: If Home Assistant did not properly execute the shell command, check if homeassistant has the ownership of all necessary files.
[IMAGE: screenshot of ls -lh in /home/homeassistant/.homeassistant/]
Too many notes: If you want to boot your computer using a shell command, there are a lot of online guides on how to set up Wake-on-LAN. I am using the wakeonlan package for example. I could write a quick guide on this too on demand, although in the end the exact details depend on your OS, network adapter and motherboard.
Almost there! Now that we got the shell command service running, we only need to link IFTTT with Home Assistant & Google Assistant and finally create an IFTTT applet to run the whole setup.
Step 3: Link the Good, the Bad and the Ugly
- Head over to the IFTTT web page and create an account.
- Click on the My Applets tab and create a New Applet.
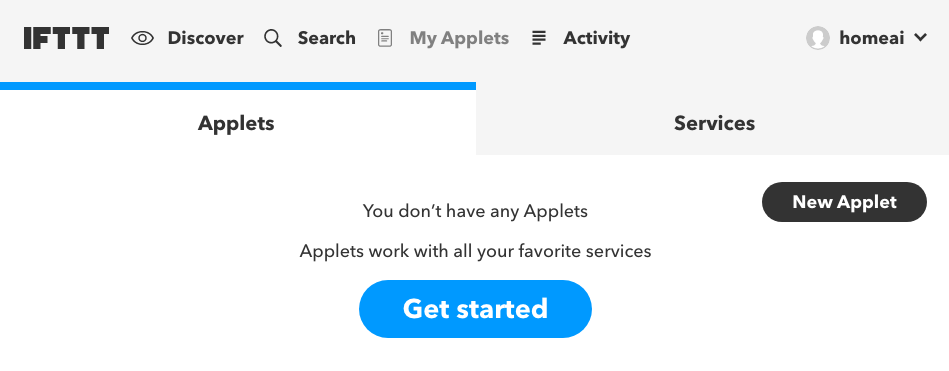
Figure 4: Create a new applet in IFTTT - Click on this
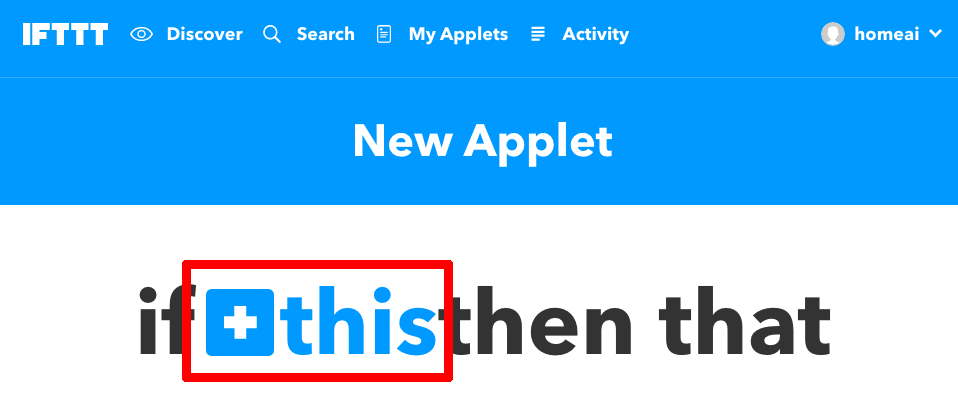
Figure 5: It wasn't obvious enough.. - Search and connect with “Google Assistant” (grant permission to the Google account you use with Google Assistant)
- Choose the trigger “Say a simple phrase”
- Write a custom voice command phrase and a response phrase for the Assistant
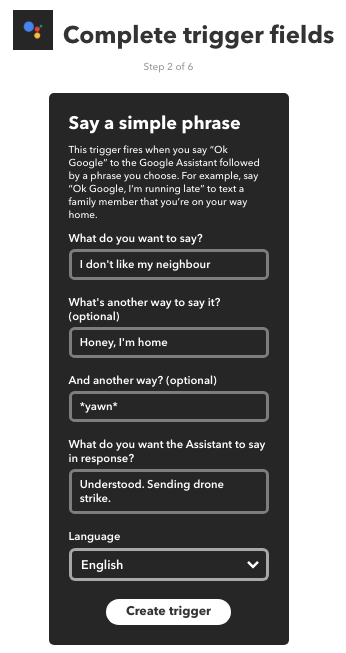
Figure 6: Words can hurt - Click on that. Search, select, connect to “Webhooks” and click on “Make a web request”.
- In URL, type:
http://<Raspberry-Pi-IP>:8123/api/services/shell_command/<command_name>?api_password=<your-password>,
e.g.http://192.168.1.101:8123/api/services/shell_command/test_cmd?api_password=PASSWORD - Choose
POSTfor Method,application/jsonfor Content type and click on “Create action”. Click on “Finish” to complete the Applet.
In the final part we need to enter the API key from IFTTT into the configuration.yaml file of our Home Assistant server.
- Still on the IFTTT webpage, navigate to “My Applets” > “Services” > “Webhooks” > “Settings”.
- Copy the letter-number-jumble at the end of the URL
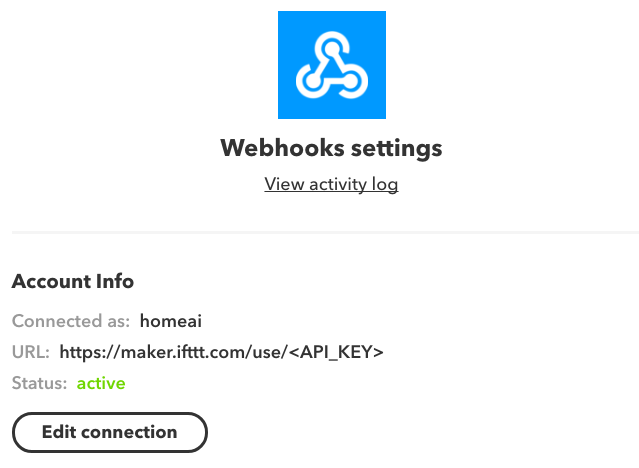
Figure 7: IFTTT API key - Head over to the
configuration.yamlfile of Home Assistant and append a new entry:ifttt: key: <your-API-KEY>
At long last, boot up your Google Assistant and say the magic words to run your shell command.
This has been quite a ride! From here on out the possibilities are endless. One of the many ways to impress your friends (and enemies?) is controlling your home devices’ electricity with your voice. Join me when we use relay modules and a couple wires to toggle ceiling lights, wall outlets and more!
Leave a Comment
Your email address will not be published. Required fields are marked *